What is Deforum
Deforum is an extension for AUTOMATIC1111 that allows you to create beautiful AI generated videos. You might’ve seen these type of videos going viral on TikTok and Youtube
How to achieve video generation with Deforum
- You enter a series of prompts, and the exact times you want the images generated by these prompts to appear.
- Stable Diffusion generates these images and fills in the rest with transition images, creating a sequence that looks like a continuous video.
- Meanwhile, you can adjust the position of the camera creating effects like zooming and rotating.
How to Install Deforum: A Comprehensive Guide
Deforum is a powerful extension that allows users to create captivating videos through Stable Diffusion technology. Here’s a detailed step-by-step guide on how to install Deforum on various platforms.
Installation Options
You have two choices for installing Deforum: installing the Stable Diffusion WebUI on your computer or running everything in the cloud with Google Colab.
Installing Deforum on Windows (NVIDIA GPU)
- Install WebUI: Follow the NVIDIA tutorial to install the WebUI, and you’ll have a folder named
stable-diffusion-webui. - Open Command Prompt: Search for “command prompt” and open it.
- Navigate to the Folder: Use
cd FOLDER-NAMEto navigate tostable-diffusion-webui. - Download the Deforum Extension: Enter the following command:bashCopy code
git clone https://github.com/deforum-art/deforum-for-automatic1111-webui extensions/deforum - Apply and Restart UI: Once the download is complete, go to the extensions tab and click “Apply and restart UI.”
Installing Deforum on Windows (AMD GPU)
Please refer to the AMD tutorial for installation.
Installing Deforum on Mac (Mac M1/M2)
- Install WebUI: Follow the Mac tutorial to install the WebUI.
- Open Terminal: Spotlight search for “terminal” and open it.
- Navigate to the Folder: Use
cd FOLDER-NAMEto navigate tostable-diffusion-webui. - Download the Deforum Extension: Enter the following command:bashCopy code
git clone https://github.com/deforum-art/deforum-for-automatic1111-webui extensions/deforum - Apply and Restart UI: After the installation is complete, go to the extensions tab and click “Apply and restart UI.”
Running Deforum on Google Colab
Choosing a Model
As with all things related to Stable Diffusion, the checkpoint model you choose will have the most significant impact on your results. Here’s a list of the most popular Stable Diffusion checkpoint models.
For the rest of this guide, we’ll either use the generic Stable Diffusion v1.5 model or the popular general-purpose model, Deliberate.
Don’t feel constrained by our choices: the examples will work with any model, but the results may vary greatly.
Checkpoint models come in either .ckpt or .safetensors format. All you have to do with these files is place them in the folder stable-diffusion-webui/models/Stable-diffusion.
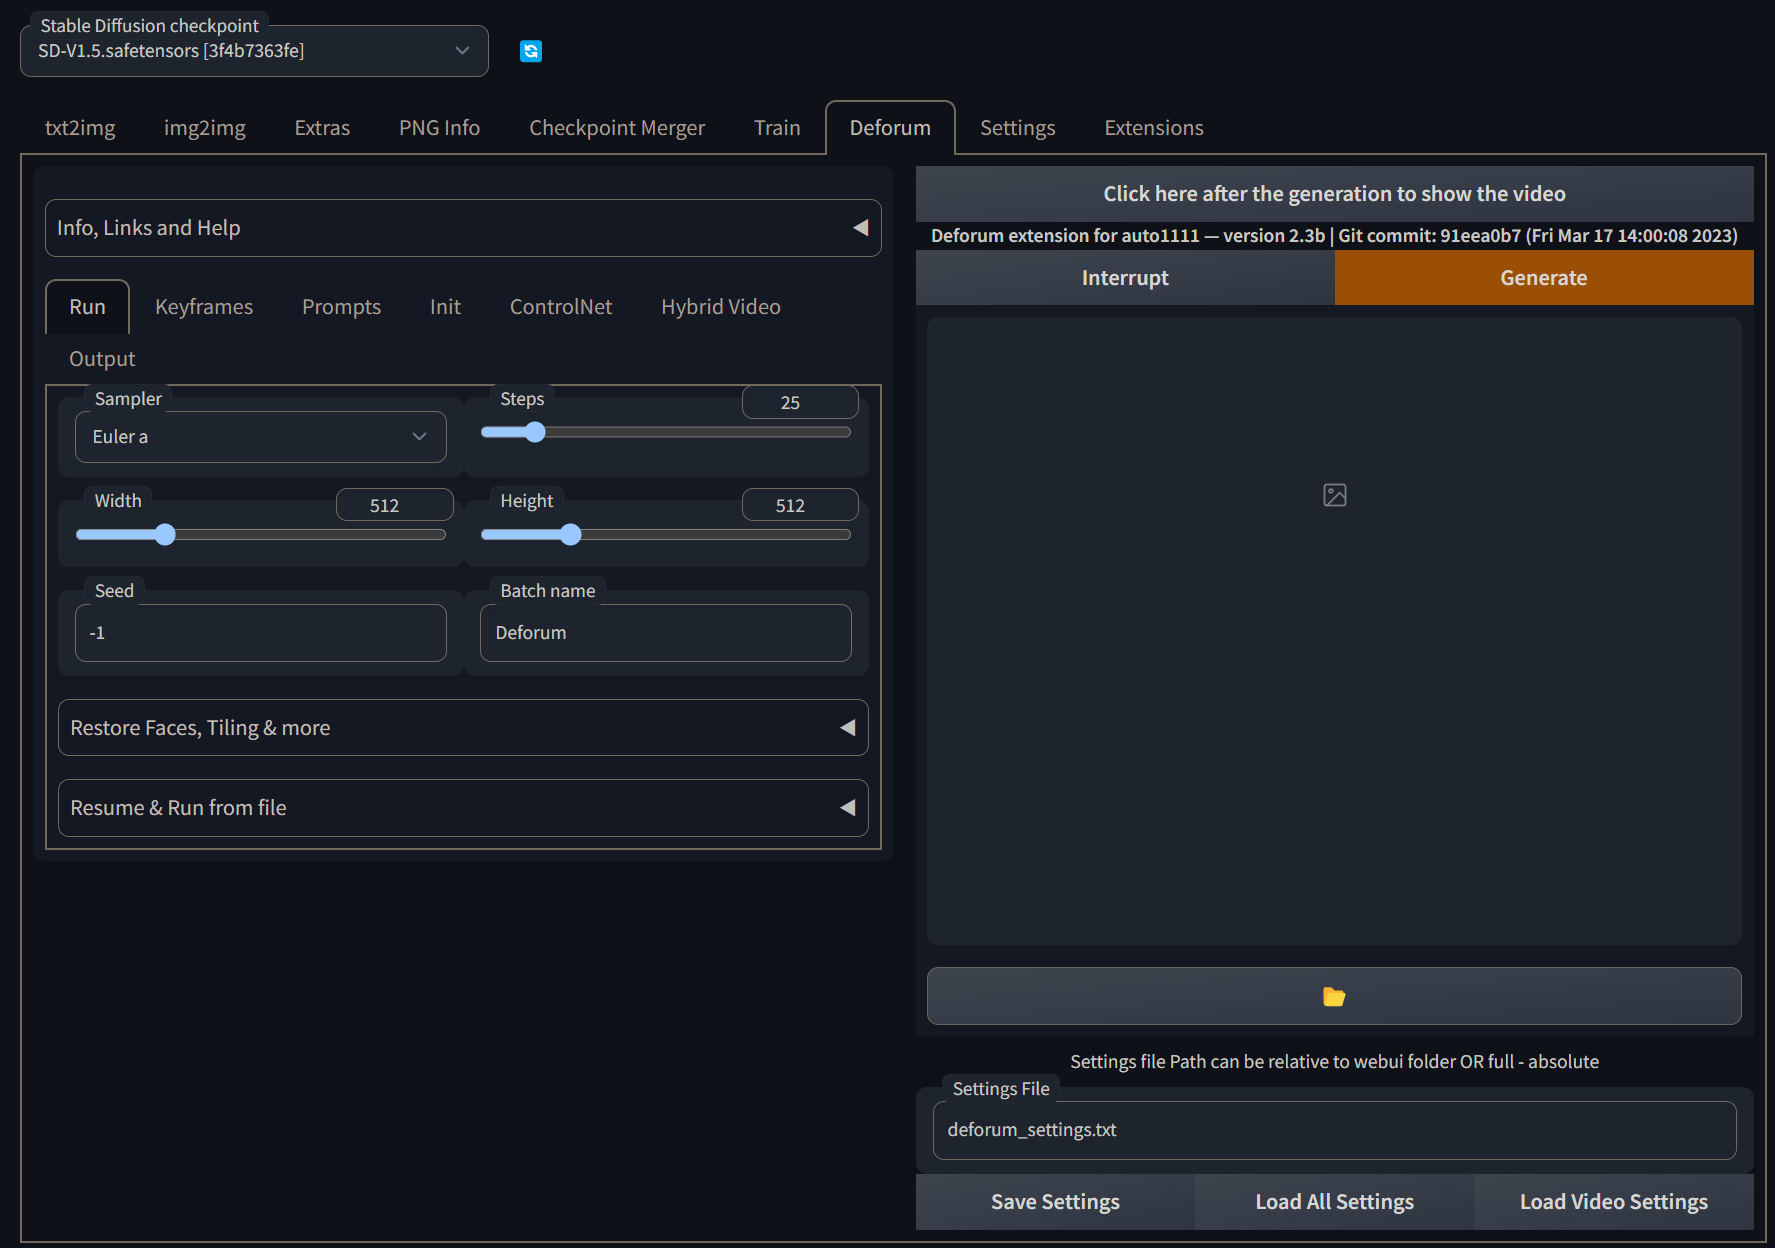
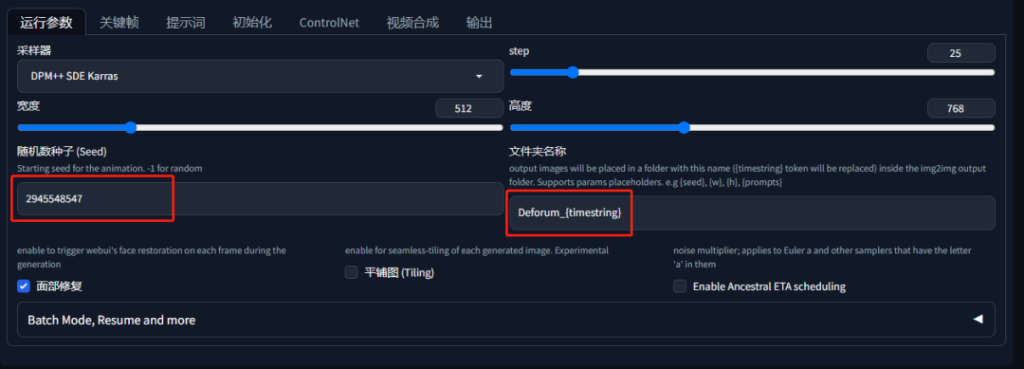
Basic Usage
Setting Running Parameters: Similar to text generation, you can set parameters like sampler width and height. You can control the first frame by filling in the seed value of your generated image.
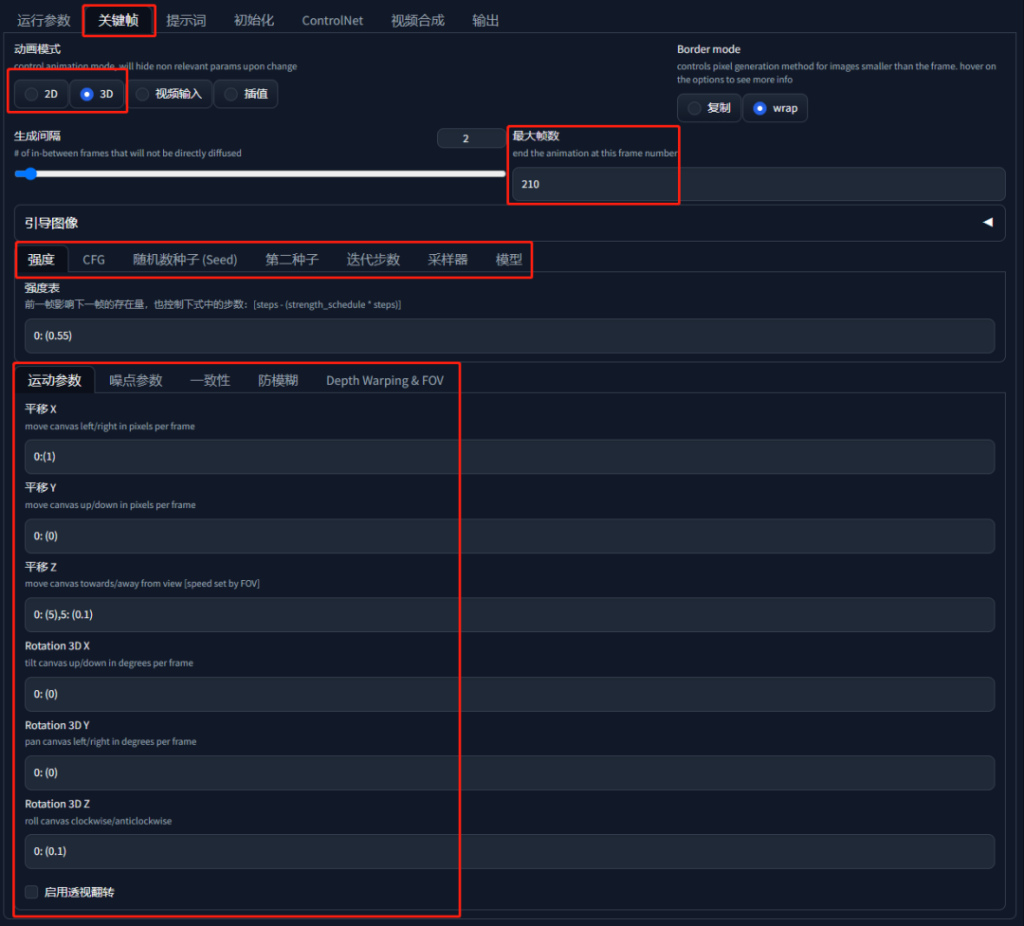
Keyframes: Set the animation mode, total frame number, etc. You can choose between 2D and 3D motion, border mode, maximum frame number, intensity table, CFG parameters, and motion parameters.
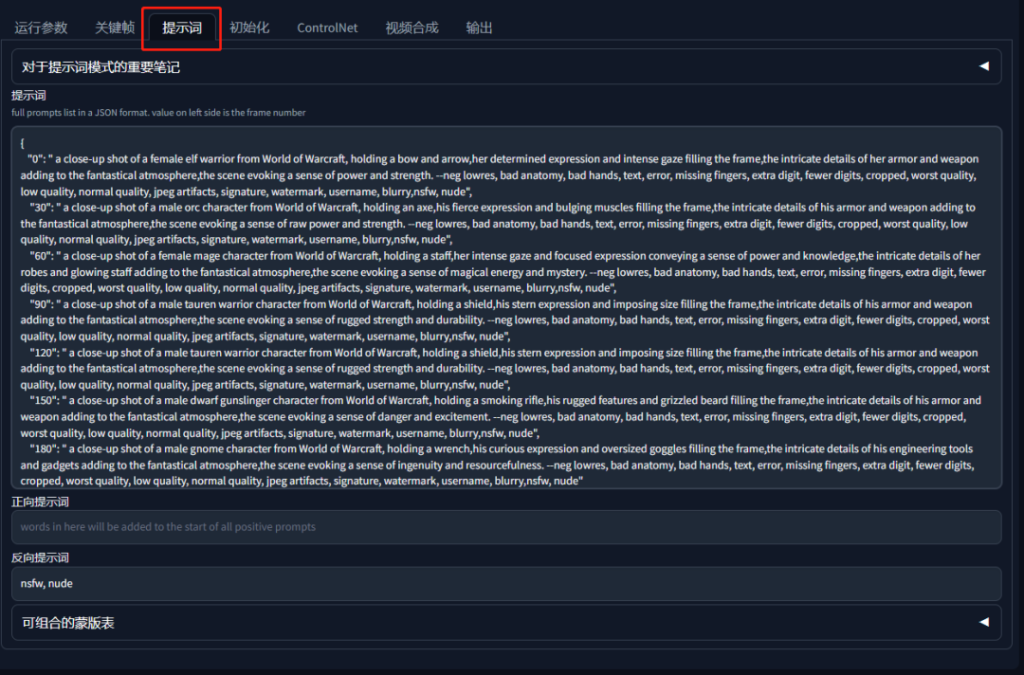
Prompt Words: Set the corresponding frame’s prompt words in JSON format.
{
“0”: “1gir. –neg nsfw, nude”,
“30”: “1boy. –neg nsfw, nude”,
“60”: “1dog. –neg nsfw, nude”,
“90”: “1cat. –neg nsfw, nude”
}
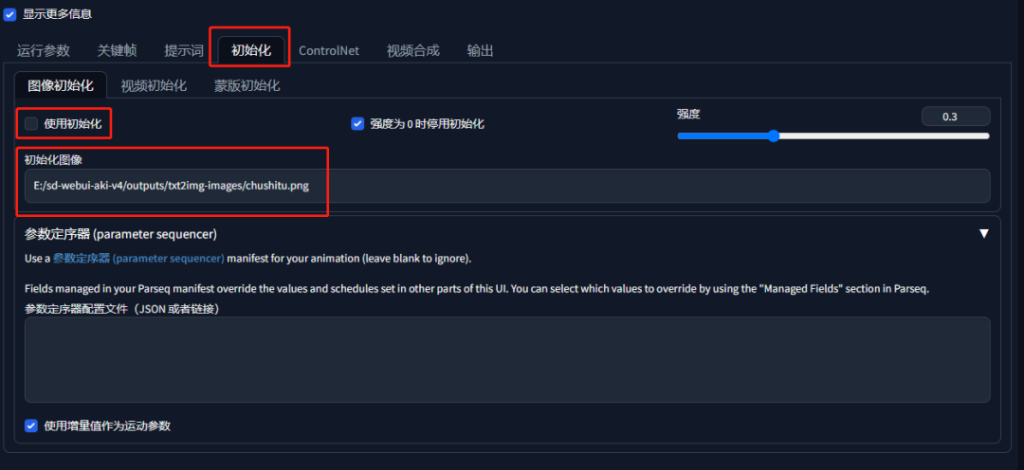
Initialization: Control the beginning with a fixed image or video.
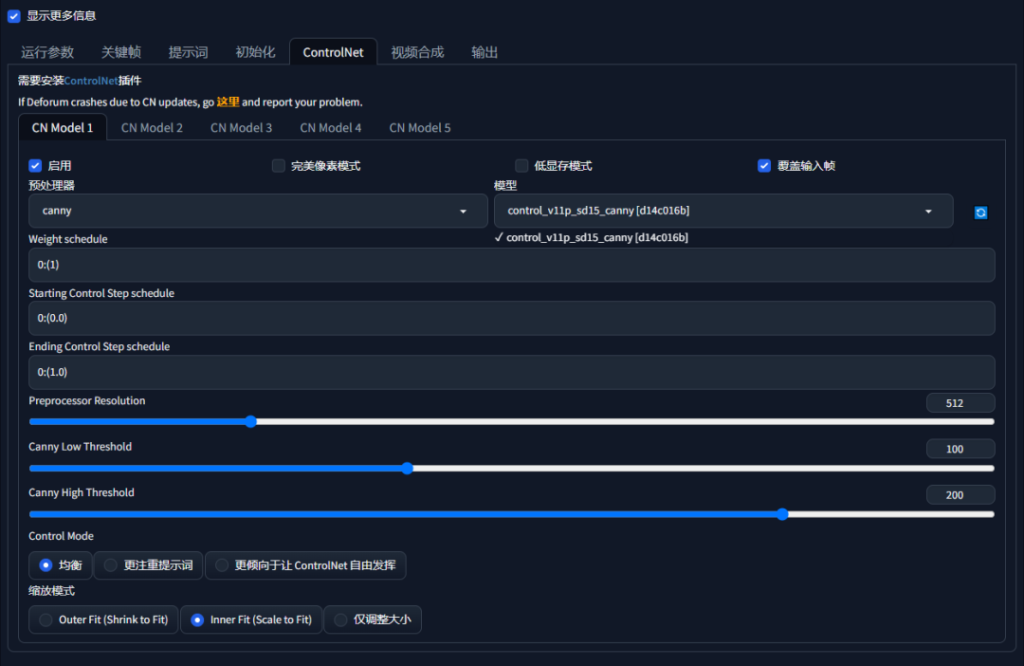
ControlNet: More precise control over the generated content.
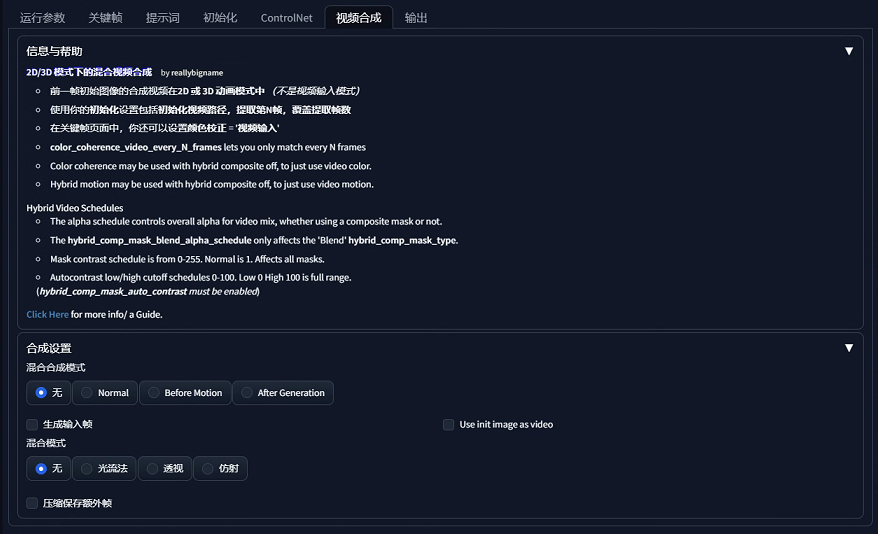
Video Synthesis: Not yet tested.
Output: Usually, you only need to set FPS for smoother video effects.

Motion Settings
Motion settings are the most commonly used options in Deforum. You can create decent videos by simply changing them and the prompts. There are two most common animation modes:
- 2D: Treats the image as 2D and performs various transformations like scaling and rotating to create a motion illusion.
- 3D: Treats the image as a view of a 3D scene, allowing you to move the camera’s viewport in any 3D operation.
2D Motion Settings
2D Zoom: Enlarge or shrink the image.


2D Angle: Rotate the image clockwise or counterclockwise.


2D Translation X/Y: Move the image horizontally or vertically.


2D Transform Center: Change the focus of scaling and/or rotating.
The default value is 0.5 for both X and Y, which is the center of the image. (X, Y) = (0, 0) is the top left corner, and (1, 1) is the bottom right corner. See the following diagram for other common locations.

You can specify values less than 0 or larger than 1. They will be outside of the image.
Below are two examples of zooming in at the top left corner (0, 0) and the bottom right (1, 1).


2D Perspective Flip: Perform 3D-like transformations.
You will need to select Enable perspective flip to enable these options.


3D Motion Settings
3D Translation X
Translation X moves the camera sideways. A positive value moves the camera to the right. A negative value moves the camera to the left.

3D Translation Y
Translation Y moves the camera up and down. Using a positive value moves the camera up. A negative value moves the camera down.

3D Translation Z
Translation Z in 3D is similar to zoom in 2D motions.

3D rotation X
Rotation X rotates the camera about the X-axis.

3D rotation Y
Rotation Y rotates the camera about the Y-axis.

3D rotation Z
Rotation Z rotates the camera about the Z-axis.

Motion Timetable
The motion settings are placed in a table with frame numbers and corresponding change numbers. You always need an entry for the 0th frame, and you can have any number of entries.
Conclusion
The first step is to choose the large model you want to use and generate a few images to see the effect. Then set the running parameters, keyframe settings, prompt words, and output items. Creating satisfying animations requires careful study and experimentation. The motion settings in Deforum are essential, and you should master how they work and their effects.